Angular.jsのチュートリアルをして遊ぼう ②コンポーネント
今回は前回の続きでAngular.jsの公式サイトのチュートリアルのコンポーネントの箇所を実施して遊ぼうと思います。
前回の記事で使用したコードを前提に作成していきますので、まず前回の記事から見ていただいたほうが良いかと思います。
1. 今日のお供
前回に引き続き、北海道ビールです。
苦味とのど越しがいいですね。
![サッポロ 北海道生ビール [ 350ml×24本 ] サッポロ 北海道生ビール [ 350ml×24本 ]](https://images-fe.ssl-images-amazon.com/images/I/51yUrhN59oL.jpg)
2. 今回参考にしたサイト
私はただ備忘録として、遊んだ結果を書きたいだけなので、本気でやりたい方はこちらを参考にされたほうが良いかと思います。
3. コンポーネントとは
コンポーネントとは要するにUIを再利用するために作成するパーツのことです(ざっくり)
前回使用したproduct-list.componentもまさにコンポーネントでして、コンポーネントは3つの要素から成り立ちます。
① コンポーネントクラス:データと機能を処理する要はJS
② HTMLテンプレート:UIのHTML
③ コンポーネント固有のスタイル:UIのCSS
product-list.componentだとこういった構成になります。

4. コンポーネントを作成・表示する。
ここからは新しく商品アラートコンポーネントを作成していきます。
(1) スターターファイルを作成します。
appディレクトリを右クリックして「Angular Generator」の「Component」をクリックします。
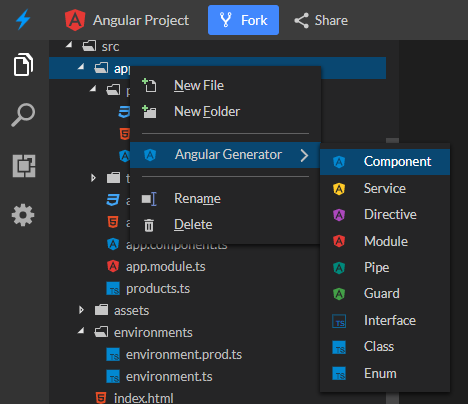
表示された入力フォームに「product-alerts」と入力します。

products-alertsのスターターファイルが作成されました。
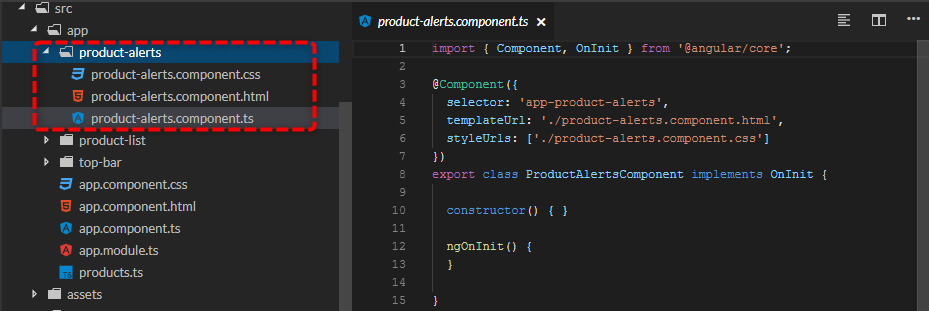
(2) product-alerts.component.tsの修正
親コンポーネント(今回でいえばproduct-list)から商品情報を受け取るよう、product-alerts.component.tsを修正していきます。
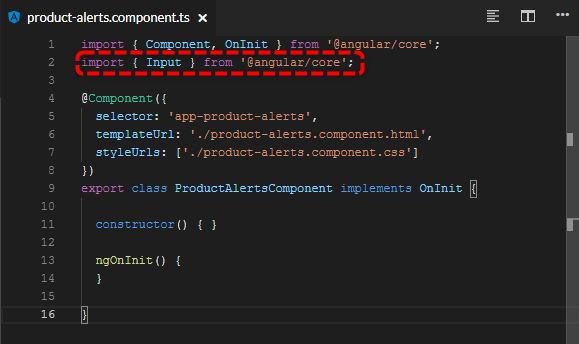
①2行目に下記を追記します。
import { Input } from '@angular/core';
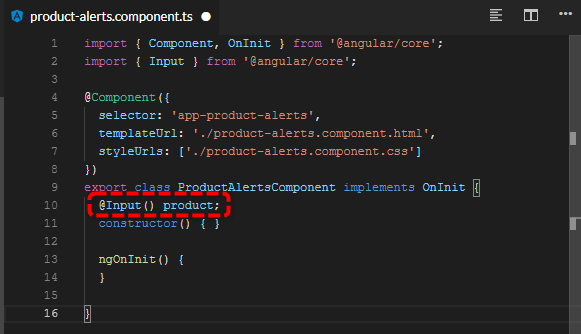
②親コンポーネントから受け取るプロパティ名を指定します。
@Input() product;
(3) product-alerts.component.htmlの修正
product-alerts.component.htmlの中身を下記に書き換えます。
<!-- 価格が700円より大きい場合表示します。-->
<p *ngIf="product.price > 700">
  <button>Notify Me</button>
</p>
(4) product-list.component.htmlの修正
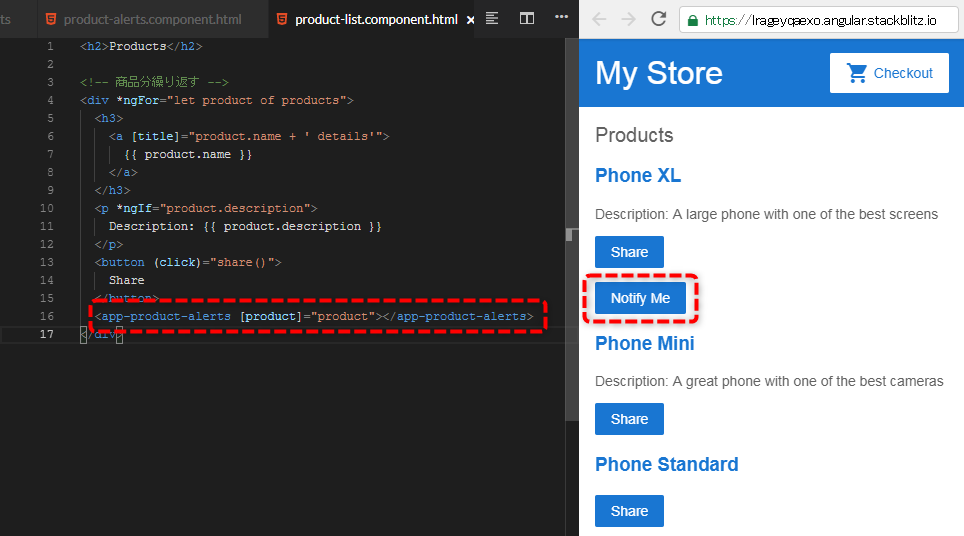
product-listに上記で作成した、product-alertsコンポーネントを表示するよう修正します。
<app-product-alerts [product]="product"></app-product-alerts>
5. コンポーネントのイベントを設定する。
[Notify Me]をクリックしたときにproduct-listコンポーネントまでイベントを発行するよう、product-alertsコンポーネントを設定します。
通知動作はproduct-listコンポーネントで定義します。
(1) product-alerts.component.tsの修正
親コンポーネントへイベントを渡せるよう、product-alerts.component.tsを修正していきます。
①3行目に下記を追記します。
import { Output, EventEmitter } from '@angular/core';
②親コンポーネントへ渡すイベントを定義します。
@Output() notify = new EventEmitter();

(2) product-alerts.component.htmlの修正
notify.emit()メソッドを呼び出すイベントバインディングを設定します。
<button (click)="notify.emit()">Notify Me</button>

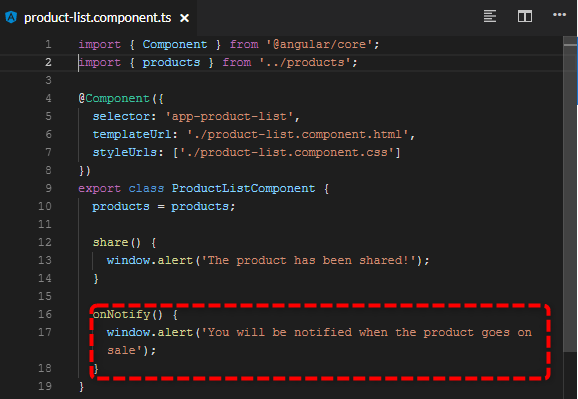
(3) product-list.component.tsの修正
[Notify Me]ボタン押下時のイベントを設定します。
  onNotify() {
    window.alert('You will be notified when the product goes on sale');
  }
(4) product-list.component.htmlの修正
product-alertsコンポーネントから、イベントを受け取れるよう、product-list.component.htmlを修正します。
<app-product-alerts
  [product]="product"
  (notify)="onNotify()">
</app-product-alerts>

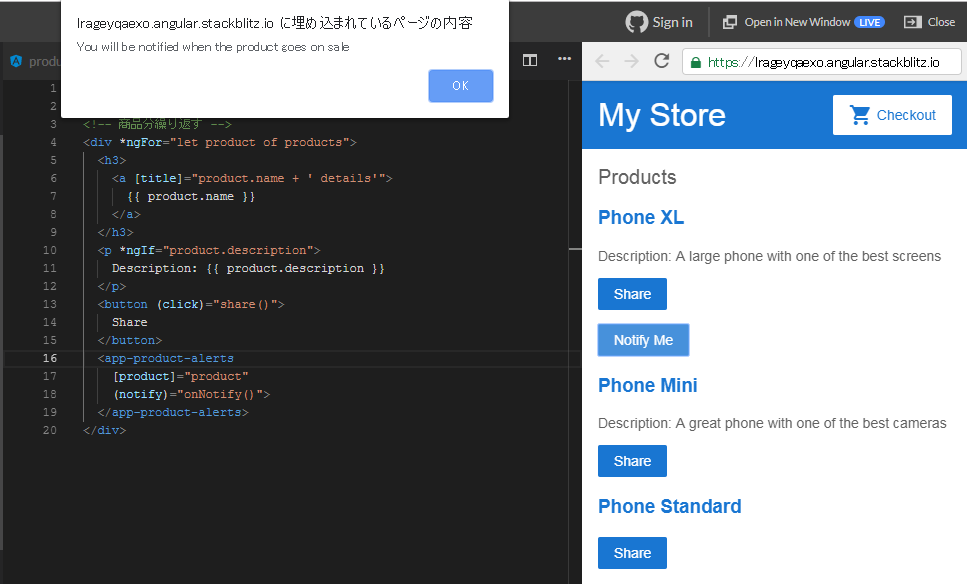
(5) 実行!
Notify Meボタンを押下すると。。イベントが実行されました!
6. コンポーネントが使えました!
今回はチュートリアルにあるとおり、コンポーネントを使用しました。
親コンポーネントと子コンポーネントのInput、Outputの概念は少し分かりにくかったのですが、下記サイトを見ると分かりやすかったです。
dev.classmethod.jp
次回はルーティングが出来たらいいなと思います。